Create a Business Profile
Set up your business on Downtown+ with a professional profile. You'll need a Downtown+ account first.
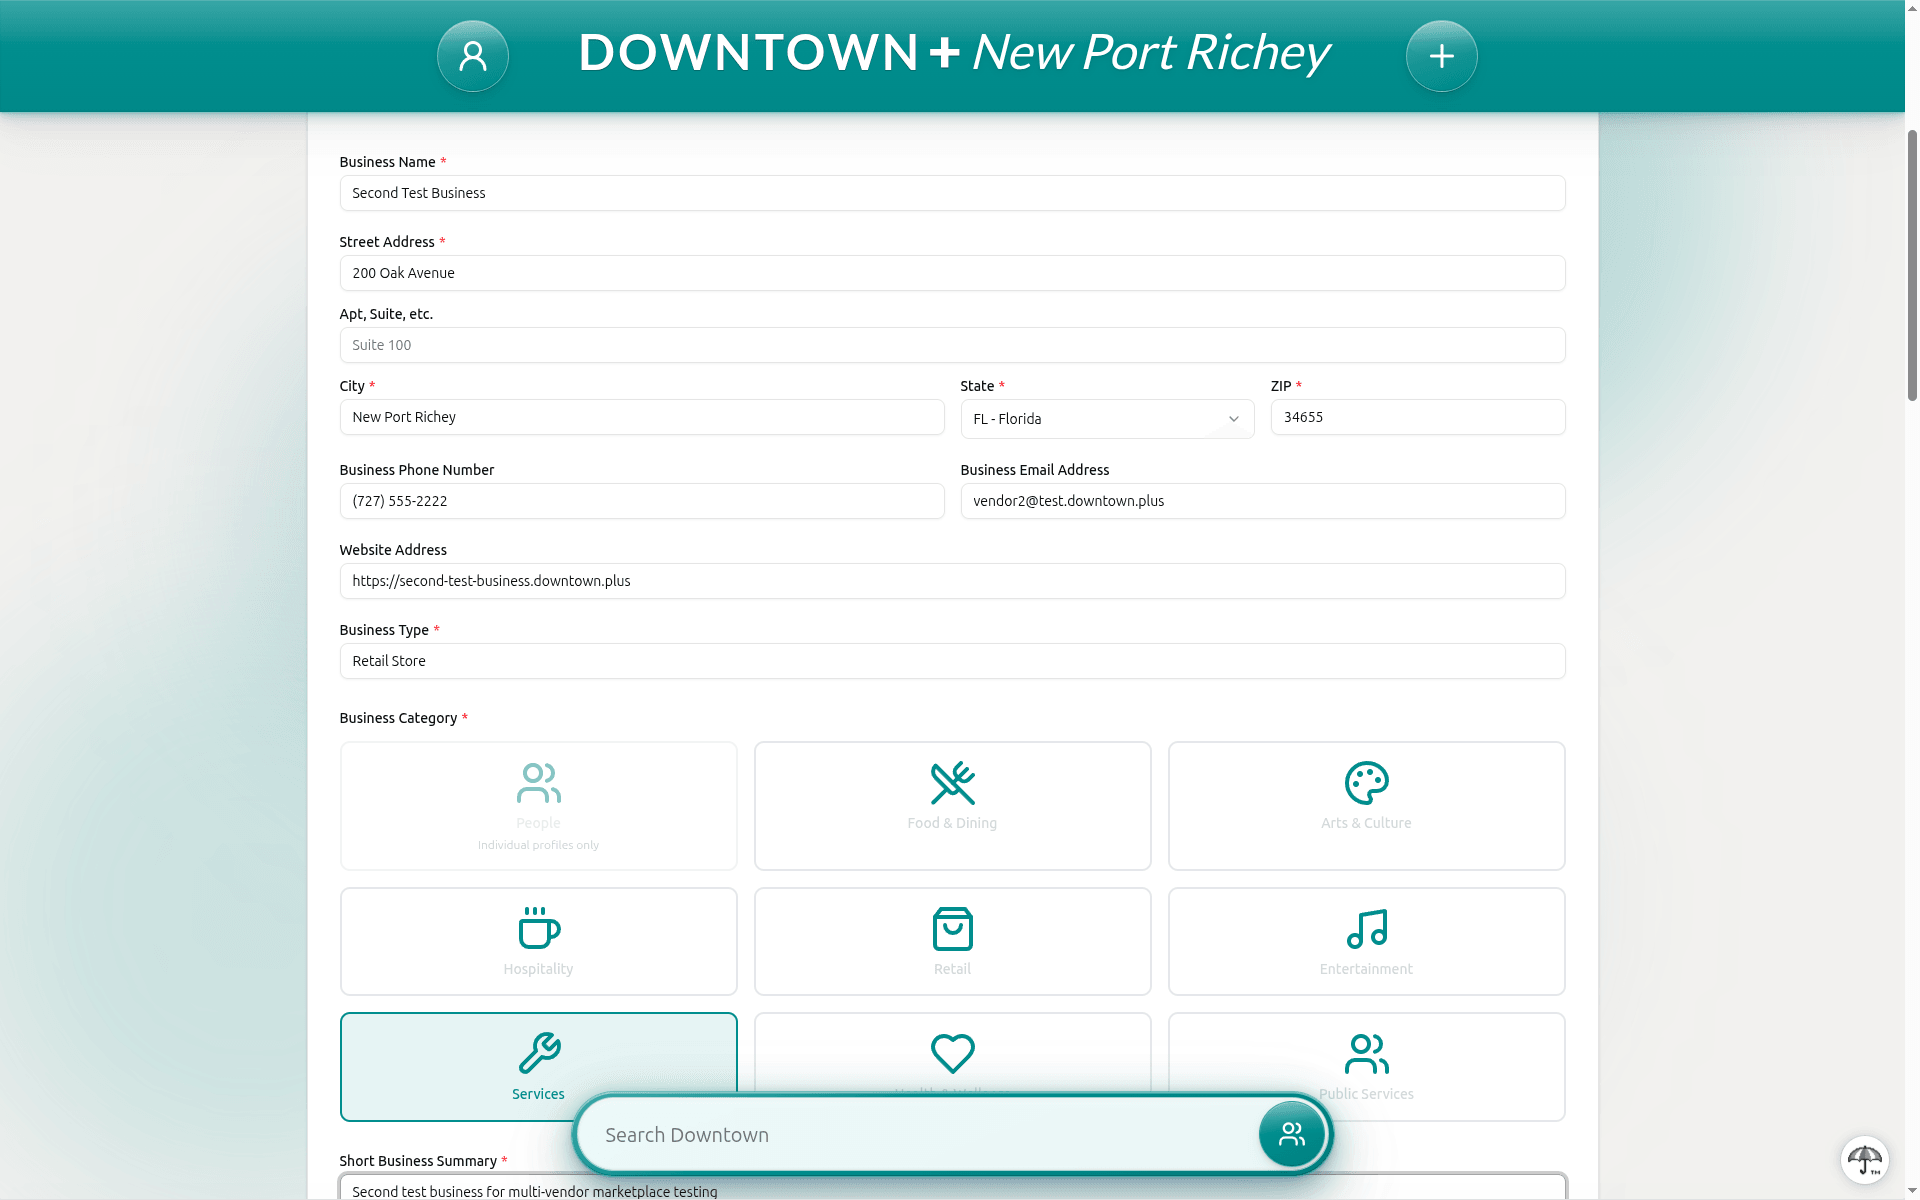
Step-by-Step
- From your Dashboard, click "Add Profile" and select Business Profile
- Enter your business name, business type (e.g. Restaurant, Law firm, Hair Salon), and a short description (up to 100 characters). Short descriptions cannot contain URLs, email addresses, phone numbers, or social media handles. Use the dedicated contact and social fields for those.
- Pick one category for your business: Food & Dining, Arts & Culture, Hospitality, Retail, Entertainment, Services, Health & Wellness, or Public Services. The "People" category is reserved for individual profiles.
- Write an extended description using the rich text editor (up to 2000 characters)
- Add contact information: phone, email, website, address. Your business address must be within the downtown's service area. The form checks your ZIP code and will let you know if it doesn't match.
- Set your hours of operation
- If your business serves food, enable the Serves Food toggle
- Upload a cover image (a wide banner that becomes the top of your profile) and a logo (shown beside your business name). Add up to 7 gallery images and an optional business video. If you skip the cover, your logo becomes the banner instead.
- Add social media links
- Submit for review
Tips for a Strong Profile
- Use clear, well-lit photos of your business
- Write a detailed description of your services
- Keep your hours up to date
- Include all social media accounts
- High-quality submissions may be approved immediately